2014-02-22

Sochi Dogs

I am not a sports fan, so it's natural that I don't write about sports news here. The Winter Olympic Games this year is definitely an exception. During this month of February in 2014, there were plenty of news stories about the 2014 Winter Olympics at Sochi, Russia. One story I could clearly recall is the malfunction during the opening ceremony.


The other story that truly attracted my attention to the Games this year was, undoubtedly, the term "biological trash."


According to Time, it is the term Alexei Sorokin used to call stray dogs. Alexei Sorokin is the owner of the company that was hired by the city of Sochi to cull stray dogs from the city’s streets. An article in USAToday has a gallery full of them.

It pains me deeply to hear that term being used to address stray dogs. I understand that the stray dog population pose a problem to the city, but explicitly treating them as rubbish/trash/garbage/waste is simply immoral. Absolutely wrong to the negative infinity. It is especially saddening when one consider the fact that dogs are generally known as man's best friend.


Isn't it in our nature to show compassion, respect, and love to these helpless beings, I wonder.

2014-02-10

FANtastic - Transplant

Few months ago, I wrote about my BitFenix Spectre Pro 200mm fan, which is installed in my NZXT Panzerbox PC chassis. Two of the fans in the chassis are of the unusually-large 200mm x 30mm type.


Recently, it came to my attention that the fan started to develop noticeable bearing noises, and the rotation speed has dropped a bit. This is a clear sign of forthcoming failure. It would be wise to seek a replacement before the fan stops running.


The replacement is a Cooler Master FA20030M12SFC. Compare to the BitFenix fan, this one is heavier, and the blades rotate much smoother. The diameter is slightly larger, even-though it is marketed as a 200mm fan. Upon powering up, I found that the speed is almost 800 RPM, slower than the BitFenix.

Like the BitFenix fan, the mounting holes of the Cooler Master fan is not designed for my NZXT chasssis. As illustrated in the picture below, the mounting holes on the original NZXT fan (left) and the Cooler Master fan (right) are not exactly the same.


Fortunately, the difference in location is small enough that one can "fix" with a drill.


Once the modification has been completed, the installation is a piece of cake.


Now, with a replacement fan running, it is time to think about what I should do with that BitFenix fan.

As mentioned earlier, the fan motor is not working well anymore. The culprit is probably the sleeve bearing, a critical and non-user-serviceable component. To most people, this fan is considered as trash. Not me though.

The Transplant

The fact is that, if one can swap in a new bearing assembly or a new brushless DC motor, the fan will be in full working order. I knew there is no way of repairing the existing motor, so the best course of action is to install a suitable motor and reuse the existing frame and rotor.


After a brief cleaning of the fan with a damp cloth, I began with the disassembling of the fan. The rotor and shaft are secured with a C-clip. Once the clip is disengaged, the rotor can be pulled out.


The motor assembly (on a circuit board with wires) and bearing are the next to go. The plastic protrusion that forms the bearing housing and motor mount will then be cut off.


The rotor needs a bit of surgery as well. The permanent magnet ring and the metal shaft in the centre must be removed.


With the help of a butane lighter and a pair of pliers, the shaft is seperated from the plastic construction. The hole in the middle, formed by melting and drilling and filing, is covered with electrical tape for the next step.


The DC brushless motor I picked for this transplant procedure is from a high-quality fan. It is an old, made-in-Japan, Sanyo Denki Mini Ace 92mm x 25mm fan that I already have in my collection. Here is a page of the datasheet:


This fan is a prime candidate since its motor size fits perfectly with the BitFenix fan rotor. Moreover, it is a ball-bearing fan with exceptional smoothness.


Since the fan will be coupled to the BitFenix fan rotor, its original frame must be removed. The blades on its rotor will need to go as well. Once these steps have been completed, I will utilize 2-part epoxy adhesive to join the motor (the part with the label) to the frame of the BitFenix fan.


As illustrated above, the motor has been glued to the frame. Hot-glue is then used to fill the "trench" around the motor.
The blades off the fan are seen in the foreground.


The epoxy adhesive sets quickly, and dries to a milky white color. Extreme care must be taken to keep the parts centered, since the permanent bond from the epoxy is almost impossible to undo. I have used electrical tape to cover the hole in the center, so that no adhesive will leak into it. A few drops of sewing machine oil into that hole will keep this motor running smoothly for a long time.


The rotor and blades of the BitFenix fan is glued to the Sanyo Denki motor with 2-part epoxy adhesive as well. The hole in the middle was blocked with electrical tape to prevent the adhesive from leaking out.


With the two parts secured joined together in the right place, I put the original oil cap and Sanyo Denki label on the back.


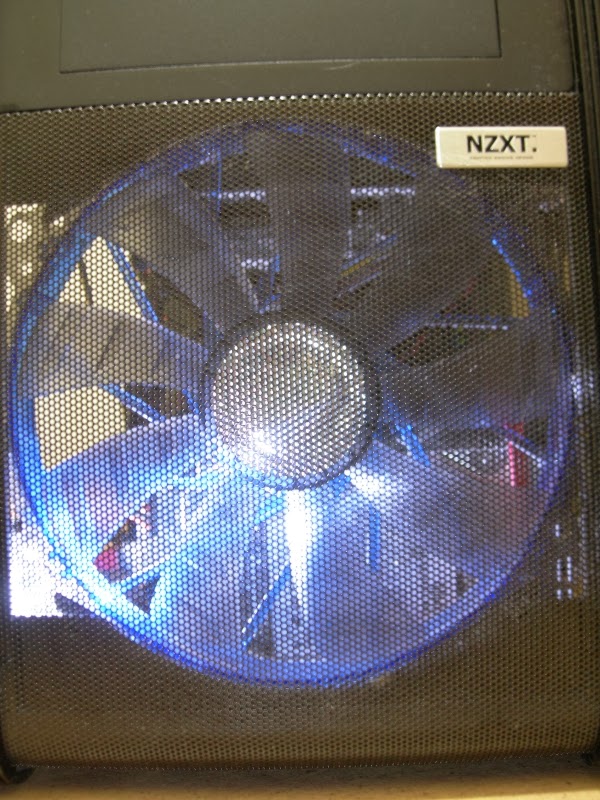
Lastly, I mounted it back in my NZXT PC chassis. Due to the larger rotor and resultant air resistance, the Sanyo Denki motor does not drive the BitFenix rotor at the original 2xxx RPM. Rather, it runs at a gentle 8xx RPM, which is close to the original speed of the BitFenix fan.



2013-12-20

Usual Suspect - Heater Control Valve

If you're the owner of a Saab sedan of the pre-GM era, there is a very high chance that you know about the dreaded heater control valve. It's also known as the coolant bypass valve. The valve is very well-known since it's one of the most common failure in the car. The generic GM part number is 90566947.

For the record, this is my second replacement on my 2001 Saab 9-3 with almost 70,000 km mileage. This particular one failed right before the holidays.

First of all, here is the failed valve (made by Topran):


As shown in the picture, the bottom part of the valve, which consists of a L-shaped tube, broke off at the seam. Now, this damage condition shown here is actually terminal. Back when the valve was still installed in the car, although coolant was seeping from the seam, that bottom part still adhered to the whole valve body. It broke off during disassembly.

Driven by curiosity, I thought it would be interesting to dissect the valve and see how it works. Lets begin...

Upon disengaging the 6 plastic clips, the top is off.


The valve is vacuum-operated, so the top has a small hole where the vacuum pipe attaches to. When there is no suction, a metal spring pushes the diaphragm down. In this position, coolant flows from the top pipe on one side to the middle pipe on the other side. When suction is applied (through a solenoid valve), the diaphragm is sucked up towards the top. In this position, coolant flows from the bottom pipe on one side to the middle pipe.


A bronze rod connects the diaphragm to a rubber seal that partitions and switches the flow of coolant. The diaphragm is a hard plastic disk with a thick rubber seal around it.


With all the movable parts (the actuator) gone, one can see the hole that the bronze rod goes through. A tight rubber seal (damaged during the dissection) keeps coolant away from the diaphragm.


This is the passageway of the coolant. The rubber seal that partitions and switches the flow of coolant is held in place by enlarging the end of the rod.


Another shot at the damage before moving on to the replacement.

The replacement is made by Febi Bilstein of Germany. 


Here is another shot, with the Febi Bilstein part number.


I wonder how long this new valve lasts. The Topran lasted almost 2 years.

The installation went well, as it was just a matter of connecting 3 coolant hoses and 1 vacuum hose. The coolant was a slightly different matter. Since it took quite a while for me to order the new valve, a considerable amount of coolant leaked out of the system. Whenever there is too little coolant (the Saab Information Display will issue an alert), I would add distilled water into the coolant recovery tank to top-up. 

With the new valve installed, and that I have already added plenty of distilled water into the system, I thought this would be a great opportunity to do a "drain and fill" procedure. The "fill" part consists of using the famous Valvoline Zerex G-05 coolant:


This coolant is supposedly the same formula as Mercedes-Benz uses in its line of sedans, and is highly praised by many Saab owners. The jug I got is old stock, as I believe current version of this product is in a white jug. The content is the same - an apple-juice-color fluid.

2013-11-20

Fix my Saab lights 3

Time for more light-related repairs and mods in my Saab.

Of all the cars I come across on the street or in the parking lot, most have a security system in it. A common sign of the existence of such system is a visible light-emitting diode (LED) flashing somewhere on the dash. It is not only an indicator of system operation, but also a deterrent - telling would-be thieves to stay away.

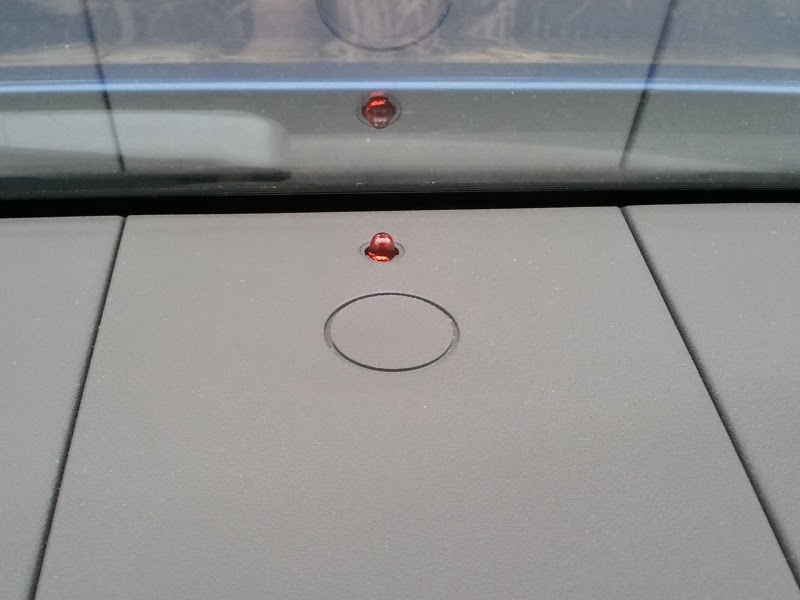
My Saab has one right in the center of the dash, like so:


Sadly, I found the LED to be reaching the end of its useful life. It is still flashing, but the luminosity has dropped to a point where it's only noticeable in very dark setting. For a security feature, this is simply unacceptable to me.

In this post, I will walk through the simple process for a changing that LED.

Saab made this easy, as the LED is mounted on a removable part of the dash.


Be careful when pulling this piece out. Due to years of exposure to the sun and heat, those little plastic tabs are fragile.

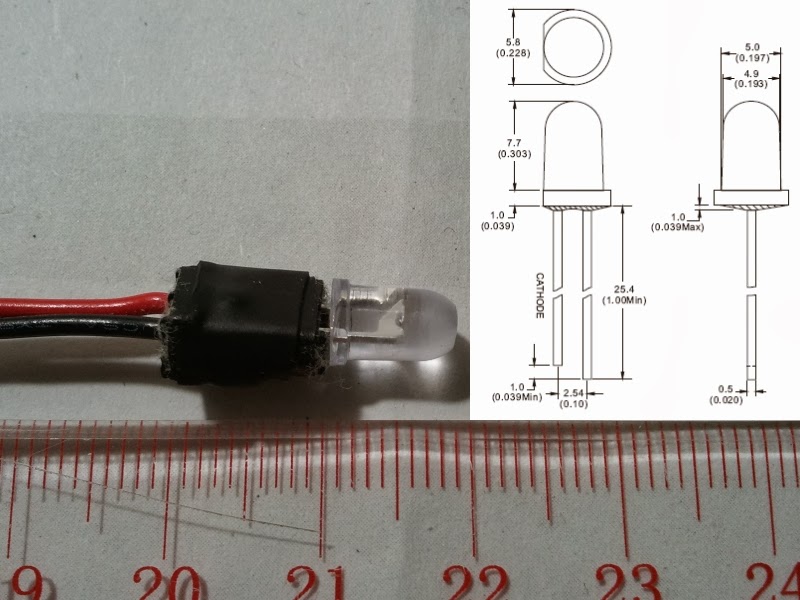
Before going into the actual replacement process, I will talk about the LED itself. The one from the factory is a typical red LED, with an industry-standard size of 5mm diameter. It is possible to change the color, since LEDs come in many other colors. 


The replacement LED I picked is similar, but much much brighter. The lens is clear but the light it emits is still red. Most LEDs have integral optics to produce that focused beam of light. Such effect is not useful in my case, though, as I want a reasonably bright red light emitted in all directions. The trick is to "frost" the lens by rubbing it with fine sandpaper in a circular motion. Also, I "flatten" the top with a file. You will see the difference towards the end of this post.

The LED has two electrical connections, just like the original. One thing to take note is polarity. If the two wires are in the wrong order, the LED will not light up at all.


In my case, I just stripped the wires on both ends and twisted them together. I did this for both wires. Once the twisting is done, I put heat-shrink tubing to protect the bare twisted conductors. I could have used soldering to form a permanent bond, but AC power was not available in the proximity of my vehicle.

The blue plastic thing is an inline splice connector but with its internal cutter removed. The shell clamps down tightly on the wires, and acts as a friction-lock to keep the connections in place. It is optional... but better safe than sorry.


That is all there is to the replacement. There is no fastener to deal with.

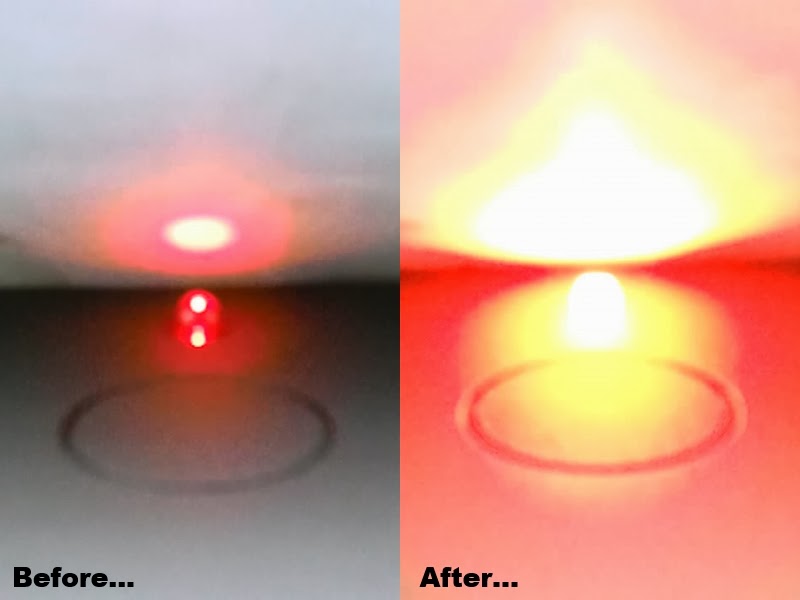
Now the moment of truth:


Please excuse the quality. The camera's auto-focus sensor doesn't like shiny LEDs.
For illustration purposes, a stack of paper has been placed against the windshield.

What a difference!

The brightness is obvious, but notice the effect from "frosting" and "flattening" of the LED.

This is exactly what I am looking for.